Setting Up Vehicle Physics Pro #
VPP may be downloaded as:
- Unitypackage file to be imported directly in Unity.
- GIT repositories that may reside in existing Unity projects as GIT submodules.
- Asset Store Package (Free Community Edition).
When upgrading VPP, check the Changelog for Release Notes and upgrade guides on the newer versions.
If switching between VPP editions (i.e. from Professional to Enterprise), then check out Switch Between VPP Editions.
Requirements #
- Minimum supported Unity version: Unity 2021 LTS
- Physics for Game Objects: Simulation Mode set to FixedUpdate
(Auto Simulation = true on Unity 2021)
Recommended Unity versions:
- LTS releases in 20XX versions.
- Stable LTS releases in generational versions (e.g., Unity 6.3+, 7.3+, …).
Vehicle Physics Pro may work in other Unity versions, but official support might not be guaranteed for non-stable Unity releases.
Download and import VPP unitypackage #
-
Download the .unitypackage file. Professional and Enterprise editions require an active VPP subscription.
-
Import the package into an Unity 3D project.
- VPP is imported into the folder Assets/Vehicle Physics Pro. Feel free to move it to a different location.
- Check out the Readme PDF file in that folder for an initial overview of VPP.
Configure the Project Settings #
It is recommended to use Linear color space (Project Settings > Player > Other Settings).
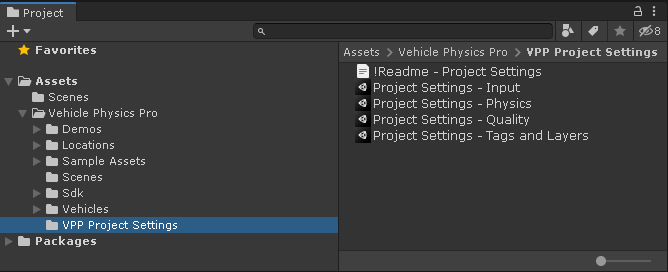
The subfolder VPP Project Settings provides specific .unitypackage files that may be imported individually to configure specific project sections.

Current Project Settings will be overriden
Each file overrides the project’s settings in the corresponding section. Ensure to have a backup or note down your values for combining them with the VPP settings.
- Project Settings - Physics
-
Physics settings used in VPP. Note that importing this file overrides your project’s Layer Collision Matrix. You may restore your own collision matrix afterwards (VPP doesn't require any special collision matrix).
WARNING: Don't configure Solver Type = Temporal Gauss Seidel (TGS) in the physics settings as this causes weird issues in vehicles. Always configure Solver Type = Projected Gauss Seidel (PGS).
- Project Settings - Quality
- Enhances the visual quality of the shadows and textures in large scenarios.
- Project Settings - Tags And Layers
- VPP demos and examples use User Layer 8 as Vehicles for visibility and reflection probes. Note that this Vehicles layer is not a requirement of VPP. Only the demos and examples use it.
- Project Settings - Assembly Definitions
-
Assembly Definitions to compile Vehicle Physics Pro into its own assemblies. You can then reference "VehiclePhysicsPro" to use VPP from your assemblies.
If this package is not imported (default) then VPP is compiled into the main Unity assemblies.
You can now head to the Getting Started section for start using Vehicle Physics Pro.
Using the GIT repositories #
Instead of importing the unitypackages you may clone the VPP repositories directly as submodules in your project. This allows your project to stay up-to-date with the latest changes in VPP as they're pushed to the repository. Accessing the repositories requires an active VPP subscription.
First you have to configure your SSH keys in your account in vehiclephysics.repositoryhosting.com (login with your VPP credentials).
GIT and SSH keys
You can learn about GIT and SSH keys in the GitHub help. Once created, simply configure your SSH key in your account in vehiclephysics.repositoryhosting.com instead of GitHub.
Then you may either:
- Clone the Unity project with the demos and example scenes already working.
- Clone the submodules into an existing Unity project to provide the VPP functionality only.
Continuous Integration systems
If you're using a CI system such as TeamCity, ensure to set the refresh interval to a reasonable rate. 1-2 times per day is enough to keep the VPP repositories updated (12 hours = 720 minutes = 43200 seconds).