Creating vehicles #
This step-by-step tutorial shows how to create and configure a new vehicle from scratch in Vehicle Physics Pro. You will be configuring and rigging the L200 Pickup Truck, but you may configure any vehicle following the same steps.
- Requirements
- An Unity 3D project with the VPP core and sample assets (see Setting Up Vehicle Physics Pro).
Basic working vehicle #
Prepare a test scene, create the vehicle GameObject, add the basic VPP components, configure and test the vehicle.
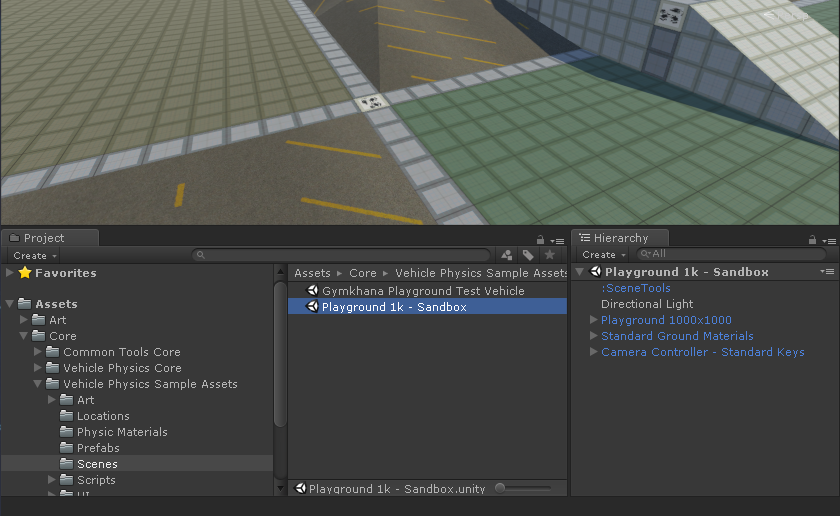
1- Prepare the environment
- Open an Unity 3D project with Vehicle Physics Pro
- Load the scene Playground 1k - Sandbox (Sample Assets > Scenes).
This scene contains everything you need: test scenario, camera, light, ground materials.
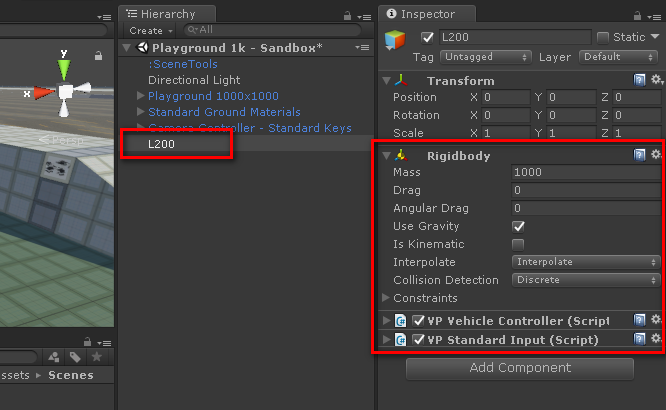
2- Create the vehicle GameObject and add the basic components
- Create an empty GameObject in the scene, name it L200.
-
Add these components from the Component menu or Add Component button:
- Component > Physics > Rigidbody.
Mass = 1200, Angular Drag = 0, Interpolation = Interpolate - Component > Vehicle Physics > Vehicle Controller
- Component > Vehicle Physics > Input > Standard Input
- Component > Physics > Rigidbody.
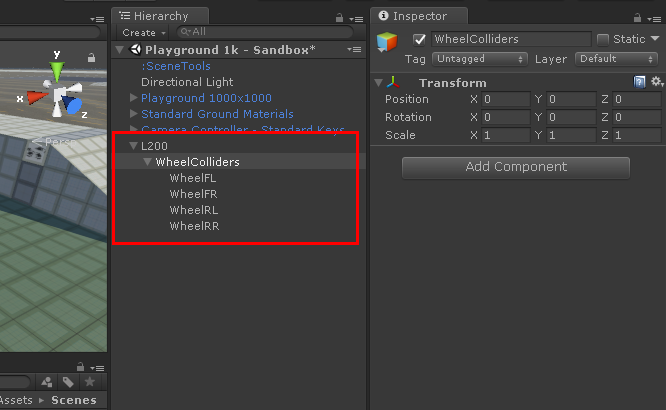
3- Create the GameObjects for the wheels
- Create a child GameObject in L200. Name it WheelColliders.
- Add four children GameObjects to it. Name them WheelFL, WheelFR, WheelRL, WheelRR.
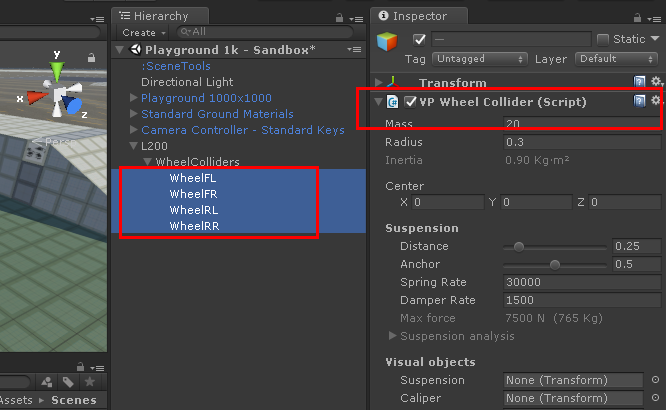
4- Add the wheel components
Select the four Wheel GameObjects, then add a VPWheelCollider component to them:
- Component > Vehicle Physics > Wheel Collider
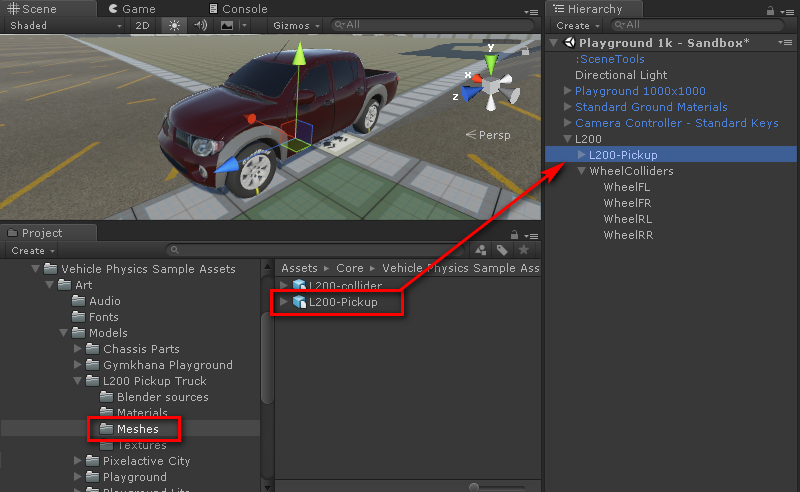
5- Add the visual mesh
- Locate the L200-Pickup mesh (Sample Assets > Art > Models > L200 Pickup Truck > Meshes).
- Drag it to the L200 GameObject in the Hierarchy so it becomes a child of L200.
Check out 3D models and environments for more information and requirements of the 3D models.
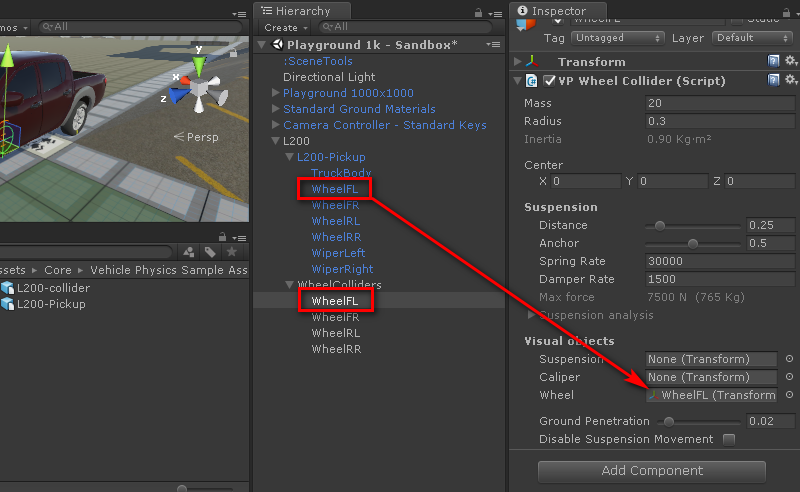
6- Assign the visual wheels to their physic counterparts
Configure the property Visual objects > Wheel in each VPWheelCollider component under WheelColliders. Drag the corresponding visual wheel from the L200-Pickup mesh to the Wheel property in the component.
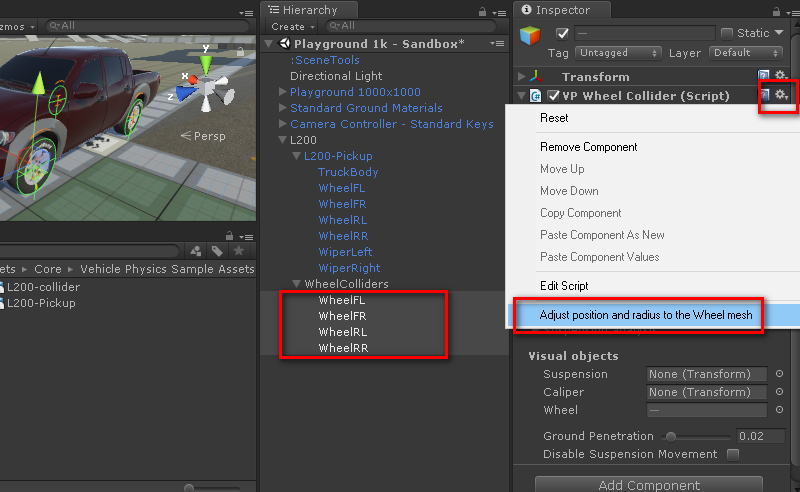
7- Adjust the physic wheels to match the visual wheels
- Select the four VPWheelCollider components under WheelColliders.
- Click the context menu for the VPWheelCollider component and choose Adjust position and radius to the Wheel mesh.
- Repeat with Configure spring and dampers to the vehicle's mass (not in the picture).
The VPWheelCollider components adjust their positions and radii to the visual wheels. See "Configuring the VPWheelColliders manually" below if you need to do it manually.
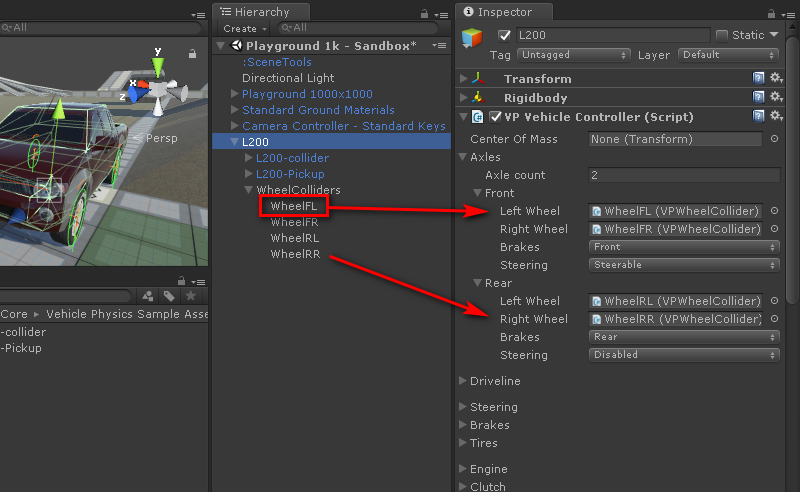
8- Configure the vehicle Axles
- Select the L200 GameObject.
- Locate the VPVehicleController component and expand the Axles section.
- Drag each wheel under WheelColliders to their corresponding slot as front/rear, left/right wheel.
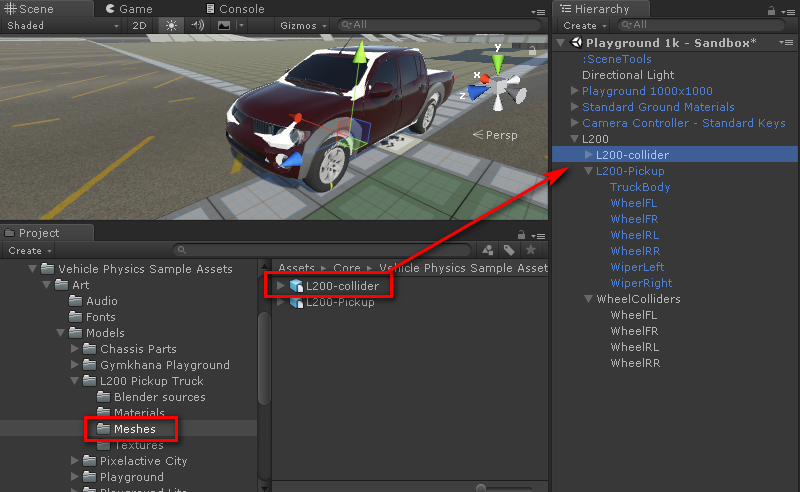
9- Add the vehicle collision mesh
The collision mesh is a simplified version of the vehicle mesh.
- Locate the L200-Collider mesh (Sample Assets > Art > Models > L200 Pickup Truck > Meshes).
- Drag it to the L200 GameObject in the Hierarchy so it becomes a child of L200.
A collider is mandatory in the vehicle. Check out 3D models and environments for important information and requirements on the collision mesh for your vehicles.
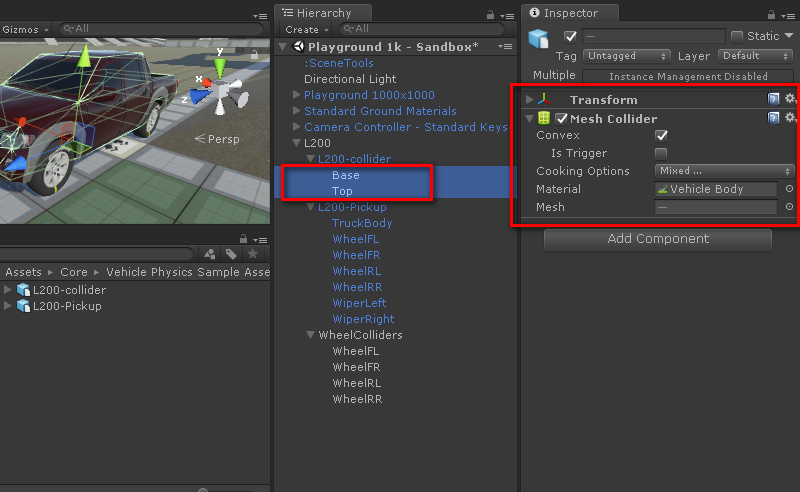
10- Configure the collision mesh as Collider
- Select all the meshes that compose the collision mesh (Base and Top in this case).
- Add a MeshCollider component and enable the Convex flag.
- Configure the physic Material as Vehicle Body.
- Remove the MeshRenderer and MeshFilter components.
The vehicle is now ready for the first test drive.
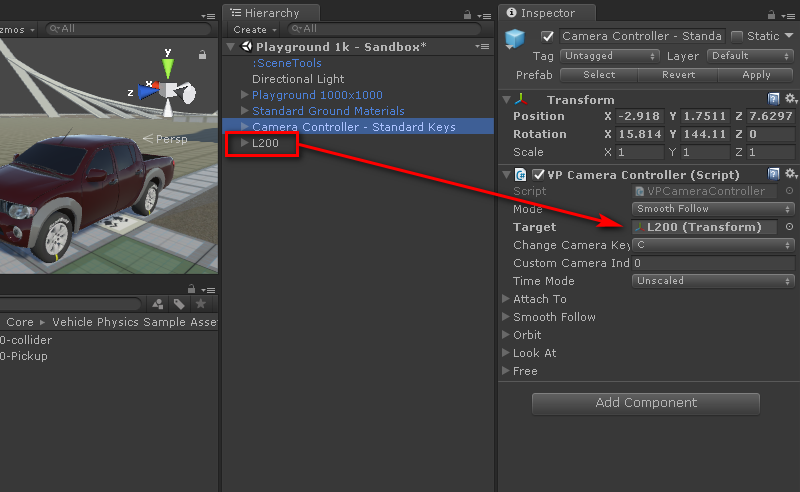
11- Configure the camera to follow the car
- Select the Camera Controller GameObject.
- Drag the L200 GameObject from the Hierarchy to the Target property in the camera controller.
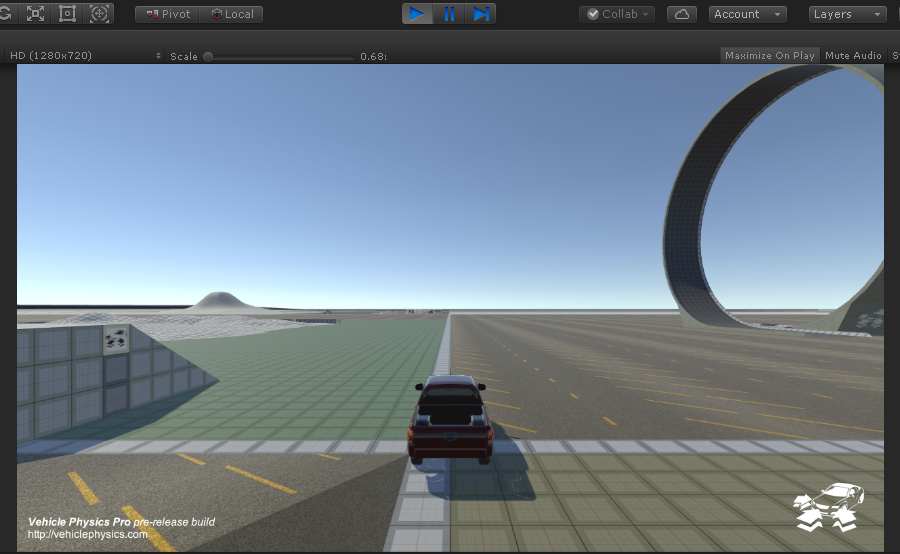
12- First test drive: Click Play in the editor!
- Throttle, brake, steering: arrow keys or WSAD
- Handbrake: space
- Clutch: ctrl (i.e. for hot starts)
- Switch camera: C, F1-F4
- Reset car: Enter (i.e. after rolling over)
- Slow time mode: T
You should now be driving the L200 in the test scene. Review the steps above carefully if something doesn't work or you get some error.
Note that vehicle dynamics are not configured at all - the car is using the default values for all components. This allows some fun driving, but the handling and behavior will be poor. The next chapter Configuring Vehicles describes everything you need to know to configure the car properly.
Configuring the VPWheelColliders manually
If the VPWheelCollider option Adjust position and radius to the Wheel mesh doesn't work in your case (step 7 above) you may do it manually:
- The position of the VPWheelCollider component must match the Transform's position of its assigned visual wheel.
- Use the VPWheelCollider's center property for moving the wheel gizmo to the outer bound of the visual wheel.
- Adjust the VPWheelCollider's radius for matching the radius of the visual wheel.
Wheel collider positions #
You may notice that the car experiences sudden bounces when touching other objects sideways. This is caused by the wheel colliders being outside the vehicle's collider.
The option Adjust position and radius to the Wheel mesh (step 7 above) places the wheel collider at the outer bound of the wheel. This position provides the best stability (larger wheelbase). However, it's important that the top half of the WheelColliders remain inside the vehicle's collider for avoiding the described effects. More information on vehicle colliders.
Check out the description of the issue and possible solutions below. Choose one of the solutions and apply it.
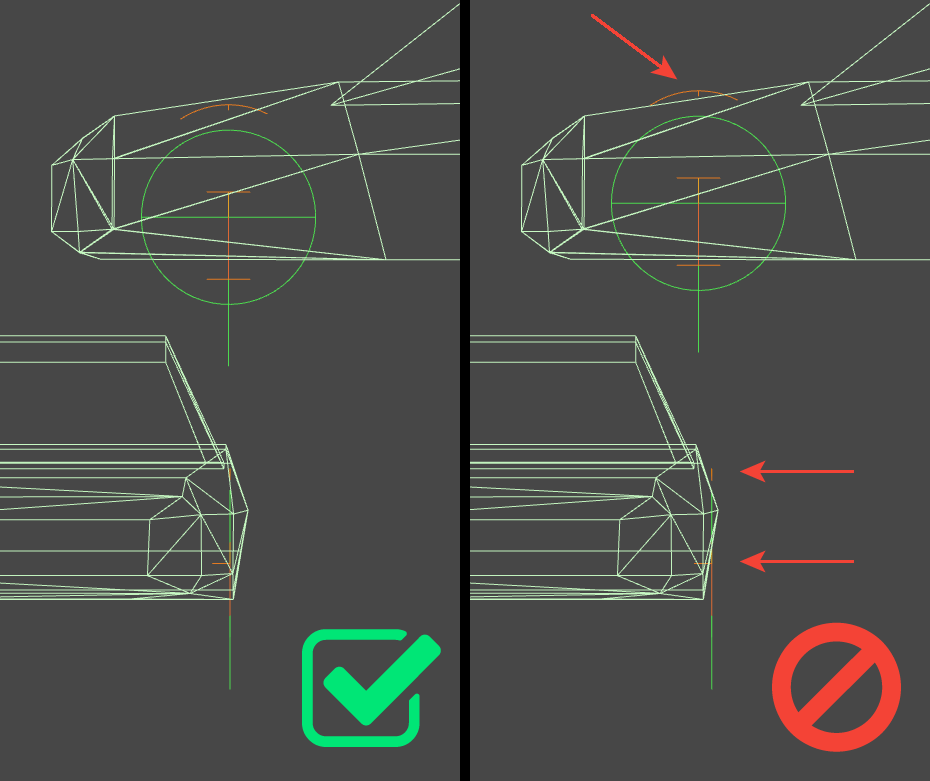
Good (left) and bad (right) positions for the wheel collider with respect to the vehicle collider.
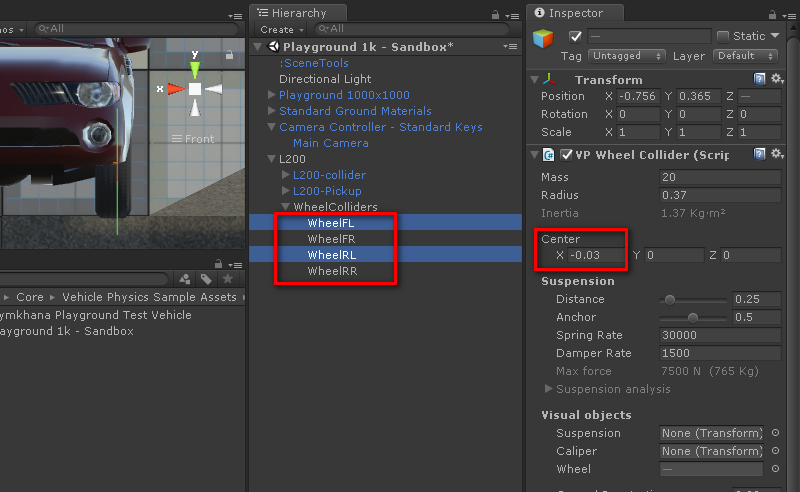
Solution 1 (recommended)
Modify center.x in the four wheel colliders to -0.03 (left wheels) or 0.03 (right wheels). This moves the wheel to the interior of the collider, but also reduces the wheelbase. As result, the vehicle will be more prone to rolling over.
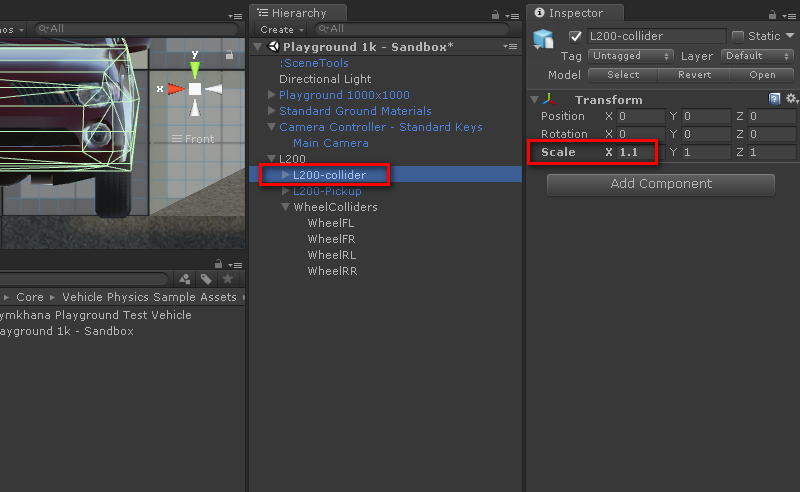
Solution 2
Modify scale.x in L200-collider to 1.1. In this case this is enough for the vehicle collider to enclose the top half of the wheel colliders.
Ideally, the collider should have been designed for including the top half of the wheel meshes.
Adding and configuring effects #
Now let's configure the basic audio and visual effects by adding add-on components to the vehicle: Telemetry, Audio, Tires, and Driver's View.
Add-on components in Vehicle Physics Pro
VPP add-on components don't need to be necessarily at the vehicle's root GameObject. These components may be added to children GameObjects as well. You may arrange several add-on components in different GameObjects of the vehicle, enable disable them at your will, and even create and dispose them in runtime.
You may Play the scene after each step for testing how it works.
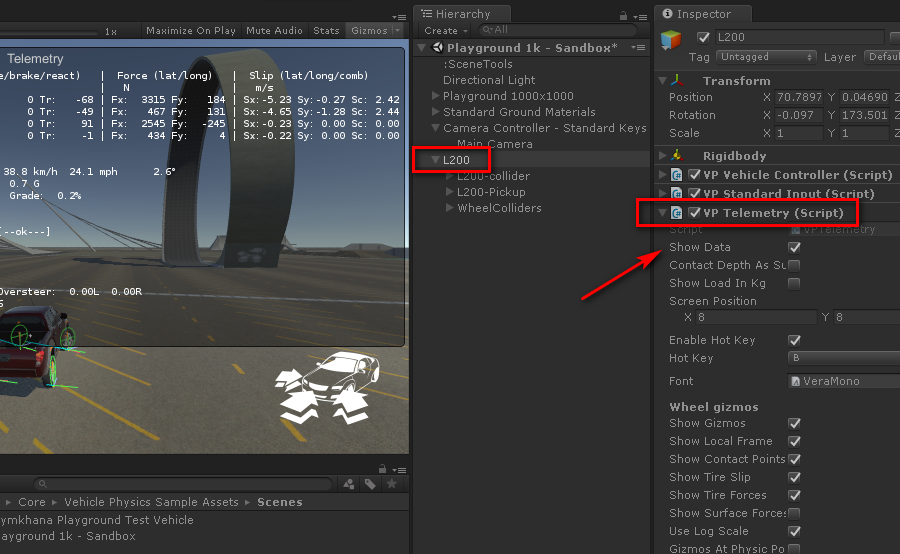
1- Telemetry
- Components > Vehicle Physics > Telemetry > Telemetry Window.
- Enable Show Data.
VPTelemetry is an invaluable tool for diagnosing issues and configuring the effects properly.
Having the Telemetry window visible while testing the vehicle is highly recommended.
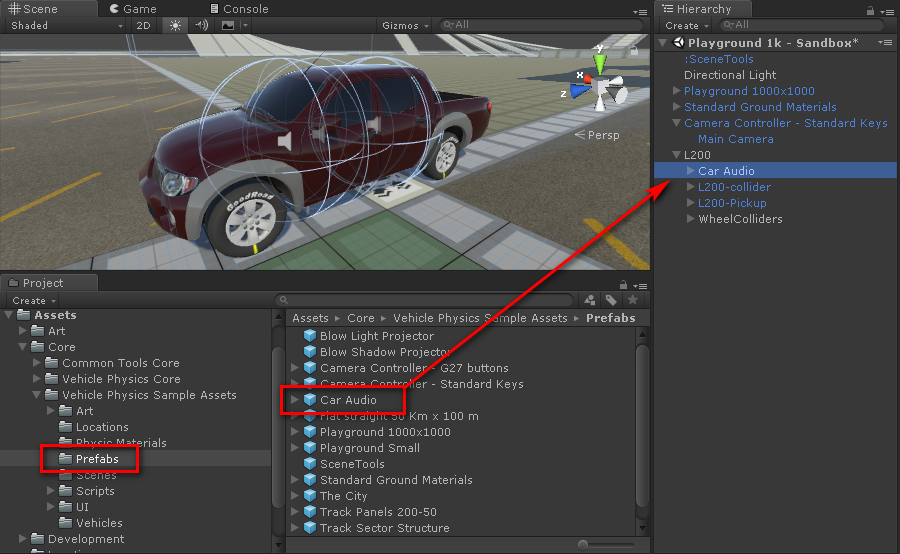
2- Audio effects
- Locate the Car Audio prefab (Sample Assets > Prefabs).
- Drag it to the L200 GameObject in the Hierarchy so it becomes a child of L200.
Car Audio includes the VPAudio component pre-configured with a set of AudioSources of standard audio effects.

3- Tire effects
- Components > Vehicle Physics > Effects > Tire Effects.
VPTireEffects includes tire marks and smoke. Different ground materials may show different marks, smoke, or particle effects (i.e. dust).
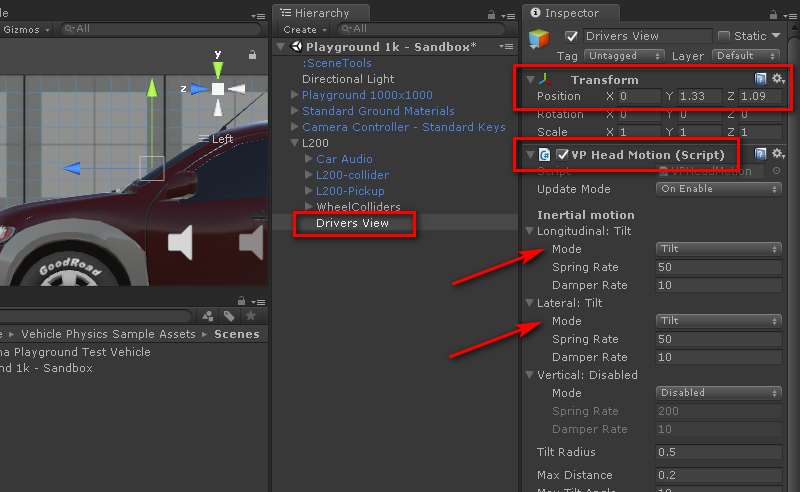
4- Configure the driver's view (1/2)
- Create a child GameObject in L200. Name it Drivers View.
- Change its local position to 0, 1.33, 1.09.
- Add a Head Motion component: Components > Vehicle Physics > Effects > Head Motion.
- Configure Longitudinal and Lateral motions as Tilt.
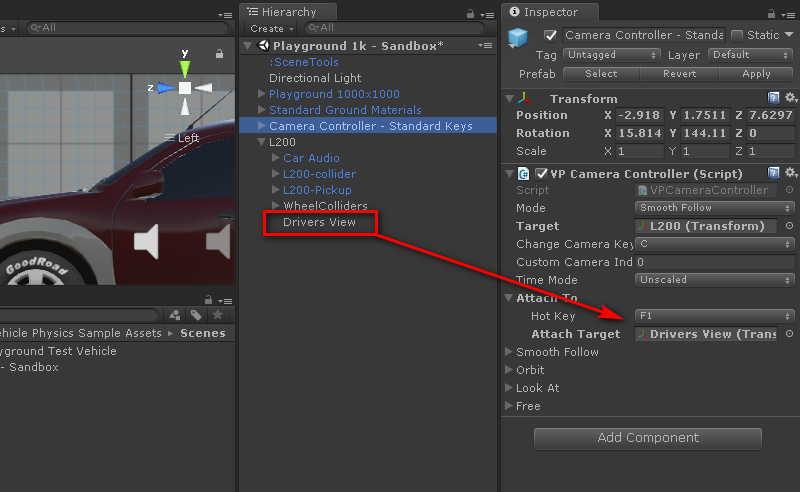
4- Configure the driver's view (2/2)
- Select the Camera Controller GameObject.
- Drag the Drivers View GameObject to Attach To > Attach Target in the camera controller.
- Press C several times (or F1 once) while playing the scene for enabling the driver's view.
Alternatively, you may configure the driver's view and other view parameters with the VPCameraTarget component (Components > Vehicle Physics > Camera > Camera Target).
Other visual effects #
The L200 3D model is not prepared for further visual effects. In your vehicles you can add a VPVisualEffects component for:
- Steering wheel rotation
- Lights: head, brakes, reverse
- Dashboard speed and rpm gauges
- Dashboard lights
Check out the VPP JPickup vehicle in the scene Getting Started - JPickup for learning how this component works.
You can now head to the Vehicle Setup Guide for configuring the vehicle dynamics (center of mass, engine, brakes, etc).