Getting started #
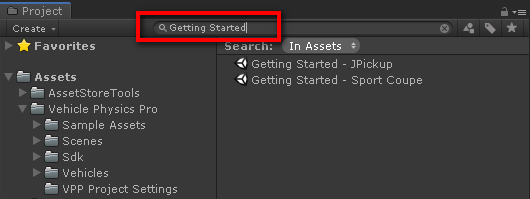
Type Getting Started in your Project's search box and open any of the scenes in the results. You should have Vehicle Physics Pro set up already (See Setting Up VPP).
If you haven't setup the Unity project yet, you can still download and play the demos
The vehicles in all these scenes typically start with the engine off. For starting the engine:
- Press K once for moving the ignition key from "Off" to "Acc-On".
-
Press and hold K for moving the ignition key to "Start" and actually start the engine.
ctrl-K moves the ignition key back to the "Off" switching off the engine.
Car controls:
| Key(s) | Function | Notes |
|---|---|---|
| K | Ignition key | - Press once to move from "Off" to "Acc-On". - Press and Hold for "Start". - ctrl+K moves the key back to "Off". |
| LeftRight | Steering | |
| Up | Throttle | |
| Down | Brakes | |
| Shift | Clutch | These vehicles typically use a Torque Converter, which doesn't require active clutch. Still, the clutch key can be used to completely disengage the engine from the transmission. |
| Space | Handbrake | |
| ctrl+Space | Toogle all brakes | Handbrake and Brakes are toggled on/off. Useful to leave the completely stopped without pressing Brakes. |
| R | Reverse gear | If auto-shift is enabled R requires the vehicle to stop. |
| N | Neutral gear | Auto-shift will engage first gear when throttle is applied. |
| Tab | Gear Up | Auto-shift might discard the change. |
| Caps Lock | Gear Down | Auto-shift might discard the change. |
| 1-5 | Engage gear | Auto-shift might discard the change and choose a more convenient gear. |
| Page upPage down | Gear mode | Select the different gear modes if the vehicle has Automatic transmission (M P R N D). The actual modes may be engaged or not depending on specific conditions (i.e. Reverse requires the vehicle to stop). |
| B | Toggle telemetry data | |
| C | Change camera | |
| F1-F4 | Select different camera modes | |
| Escape | Reset scene | |
| T | Toggle slow motion mode |
Vehicle setup #
The main component that implements the vehicle simulation is VP Vehicle Controller. The object VPP Pickup in the pickup test scene contains this component with all its settings to play with:
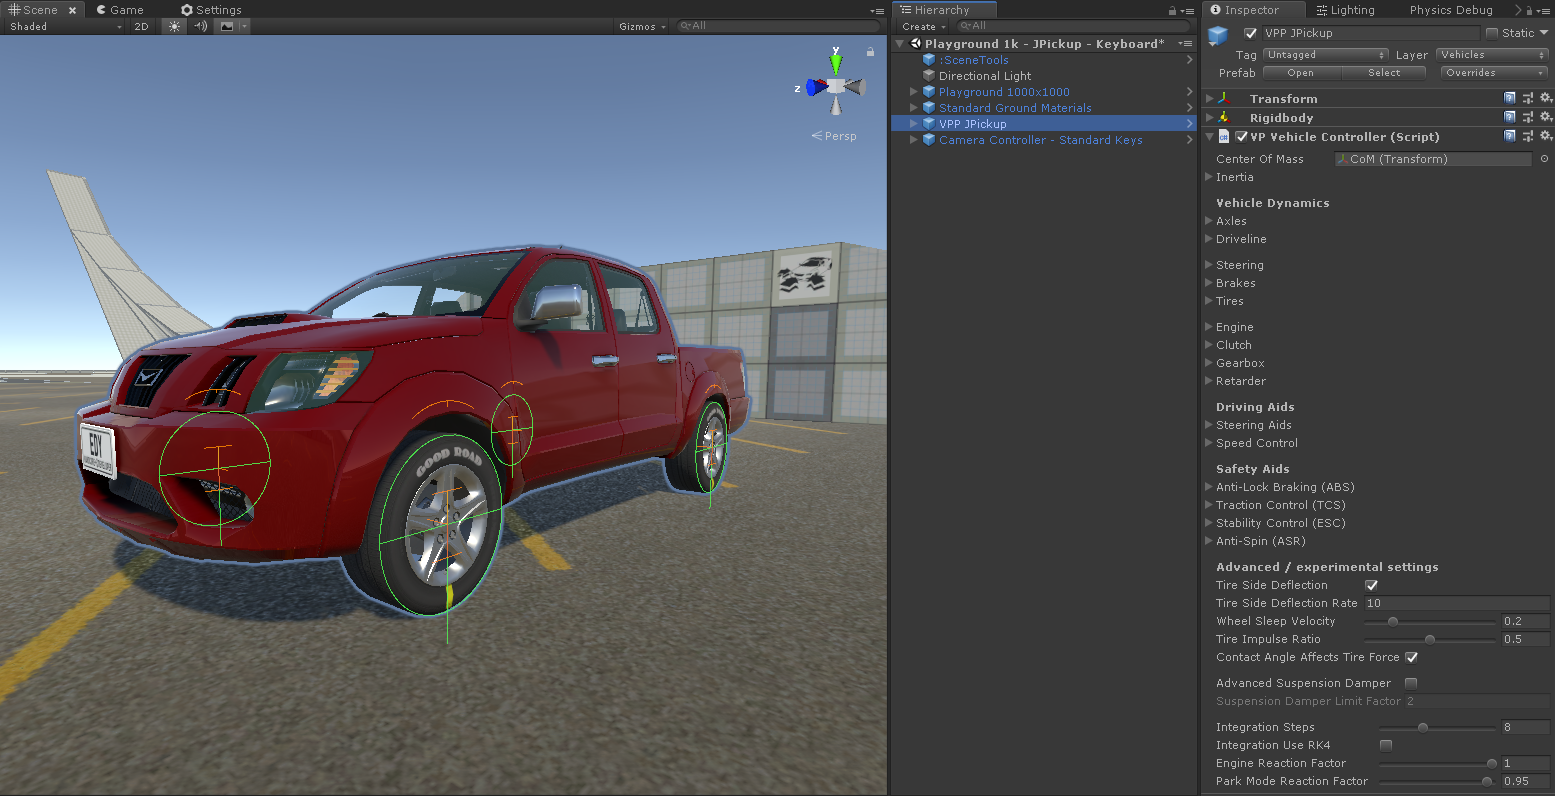
- Center Of Mass: references the position of the center of mass in the vehicle.
- Inertia: configures the distribution of mass in the vehicle. Affects understeering / oversteering behavior.
- Axes: references to the wheels and assigns steering and brakes to them.
- Steering: steering angle, ackerman, toe.
- Brakes: brake torques, balance, handbrake.
- Tires: tire friction model and parameters.
- Driveline: driveline type and component setup (differentials, torque splitter). Current setup is RWD with a Torque Splitter dynamically routing part of the drive to the front axle.
- Engine: torque and power curves, rpm limiter, stall settings.
- Clutch: type of clutch and parameters. Using a torque converter is very handy when a real clutch simulation (Friction Disc) is not required.
- Gearbox: transmission type, gear ratios, auto-shift parameters.
- Retarder: typically used by heavy vehicles, not used at the pickup (zero levels).
- Advanced / Experimental settings: leave then untouched for now. Learn more
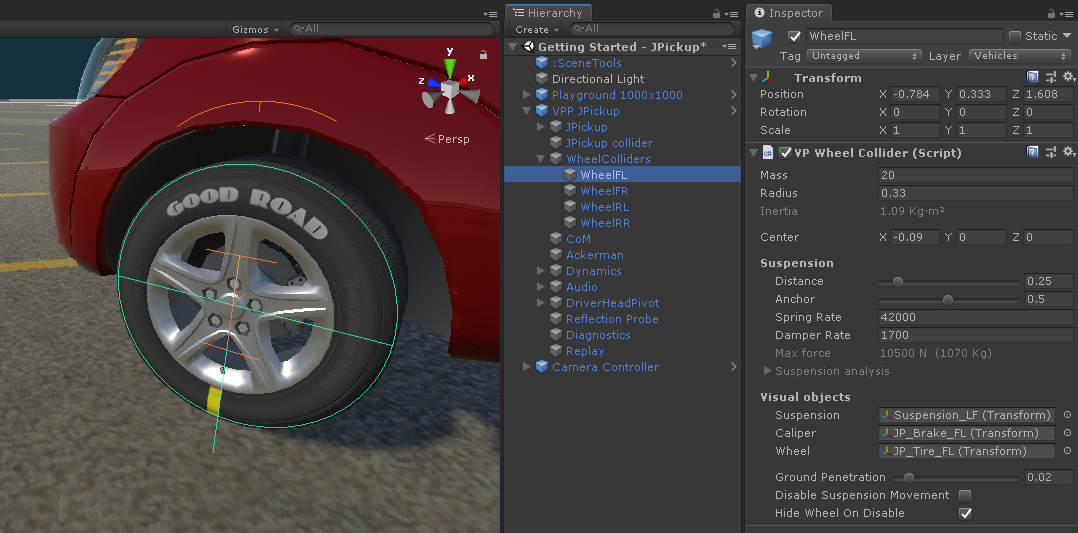
The mass of the vehicle is configured at the Rigidbody component.
Wheel properties (radius, mass) and suspension settings (spring, damper) are handled per-wheel at the VP Wheel Collider components:
Other components #
The other components in the Vehicle GameObject provide different add-on functionalities and features:
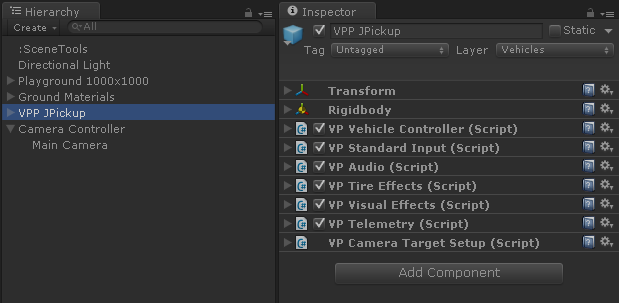
- VP Standard Input
-
Reads the user input from the standard Unity Input class, then converts it into input for the vehicle: steering, throttle, brake, etc.
- VP Audio
-
Plays various audio effects based on the state of the vehicle and the wheels.
- VP Tire Effects
-
Triggers the tire-related effects such as marks, trails, smoke, and dust based on the state of each wheel and the underlying Ground Material.
- VP Visual Effects
-
Plays various visual effects such as the steering wheel rotation, brake and reverse lights, and dashboard gauges.
- VP Telemetry
-
Displays a overlay window with detailed numeric data on the wheels and the vehicle. Toggle with the B key.
- VP Camera Target Setup
-
Configures the parameters for this vehicle to be properly looked at with the Camera Controller component, such as minimum distance, view height, and more.
Ground Materials #
The component VP Ground Material Manager manages the ground materials present at the scene.
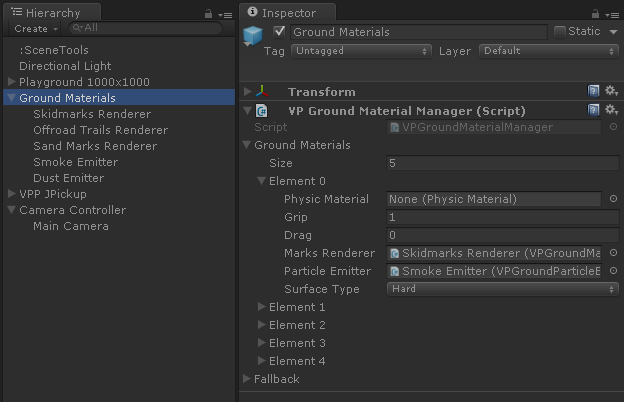
Each Ground Material defines the material properties such as grip, drag, and the objects used for playing the tire effects (marks, smoke...) on that material.
The ground materials are identified by the Physics Materials assigned to the colliders in the scene. Colliders without Physic Material assigned can also have their Ground Material (Physic Material = none, as shown in the above pic). Note that the friction properties in the Physic Materials don't affect the tire friction.
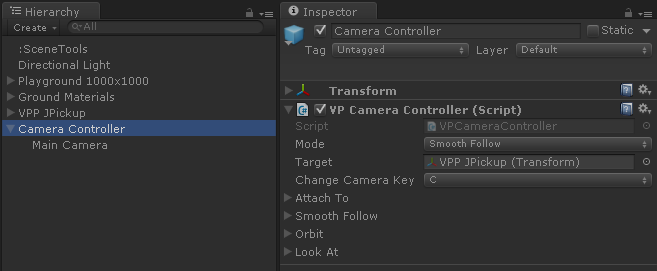
Camera Controller #
The component VP Camera Controller controls the camera movement based on the target vehicle and several camera modes available.
Now that you know how vehicles work in Vehicle Physics Pro, you can now create and configure a vehicle youself.